
Death Valley sand dunes photography can pose unique challenges for photographers and their gear. Heat and cold, wind, brilliant light, and compositional challenges can be expected as routine elements of the pursuit. Being properly prepared and outfitted can result in significantly better outcomes and experiences. I spend many days each year wandering through Death Valley’s sand dune complexes in pursuit of photographs and experiences and have learned a few things along the way. Here are a few tips on desert photography settings to help you with your own sand dunes photography.

Difficulties such as wind, heat and cold, thirst, and your discomfort seem even more difficult when your tools are not behaving. Tough conditions are not the right time to find out that you dislike the design, functionality, or quality of your camera, tripod, or camera pack. Own the best gear you can afford and know it well before beginning your Death Valley sand dunes photography adventure. Arrive prepared.
Inexpensive tripod legs are not the best suited to rugged outdoor sand dune photography; flip-locks and threaded collars can quickly become gritty or jammed on the dunes. Tripod heads can seize and become inoperable. Windblown dust and sand can easily invade unsealed consumer-grade lenses. Buy top-of-the-line glass or at least the best you can afford.
For Death Valley photography tours you should carry your gear in a comfortable and weatherproof backpack that you have you adequately tested in advance, leaving room for water, food, accessories, and extra clothing. Practice with and learn your gear at home under controlled conditions.

Professional-grade cameras are generally well-sealed against the elements. If you wish to further protect your camera body from bumps, scratches, and grime, consider wrapping it in a custom-fit silicone skin (available at major camera retailers). You might also consider affixing a UV filter (Ultraviolet) to the front element of each of your lenses to protect the glass against windblown sand and drops or fractures.
Your camera is a tool. Do not be afraid to change lenses in windy conditions on the dunes (consider insuring your gear). Windy conditions have provided me with some of my most dynamic photographs and I would have missed them if I had prioritized gear-safety over the photograph. When changing lenses in windy and gritty conditions, turn your back to the wind and huddle over your camera, then dismount/mount your lens with the body facing down (sensor pointed toward the ground). This is the most effective way to body-block blowing dust and sand while simultaneously protecting the camera sensor. Carry a blower, brush, and whatever other accessories you need. Sensors can be cleaned and replaced; missed photographs are forever. Your camera is a tool.

For my camera settings, I prefer to shoot in AV mode (Aperture Priority). What aperture to choose always depends upon my desired intent: do I want to isolate focus or do I want everything in sharp focus from near to far? Isolated focus dictates large apertures (large aperture but small f-stop number); an aperture such as f2.8 or f4 or even f5.6. If I want everything in sharp focus from near to far, my aperture is likely to be f16 or more (small aperture but large f-stop number). In this scenario, I’ll often focus-bracket (for greatest resolution and to avoid loss of sharpness to diffraction) and focus-stack the frames in post-production using software such as Adobe Photoshop or Helicon Focus (Adobe Lightroom can merge exposure but not focus).

Unless motion is a concern (wind-induced plant movement, for example), I always choose my camera’s lowest native ISO to minimize noise (64 on my Nikon D850) and shoot with the camera firmly mounted on a tripod using either mirror-lockup or Live View to eliminate any potential for mirror vibration (this is irrelevant to non-reflex mirrorless camera systems).
If you desire professional quality results from your Death Valley sand dunes photography, implement professional field practices. Artistic laziness and shortcuts often result in technical errors which will be readily evident when you print enlargements.
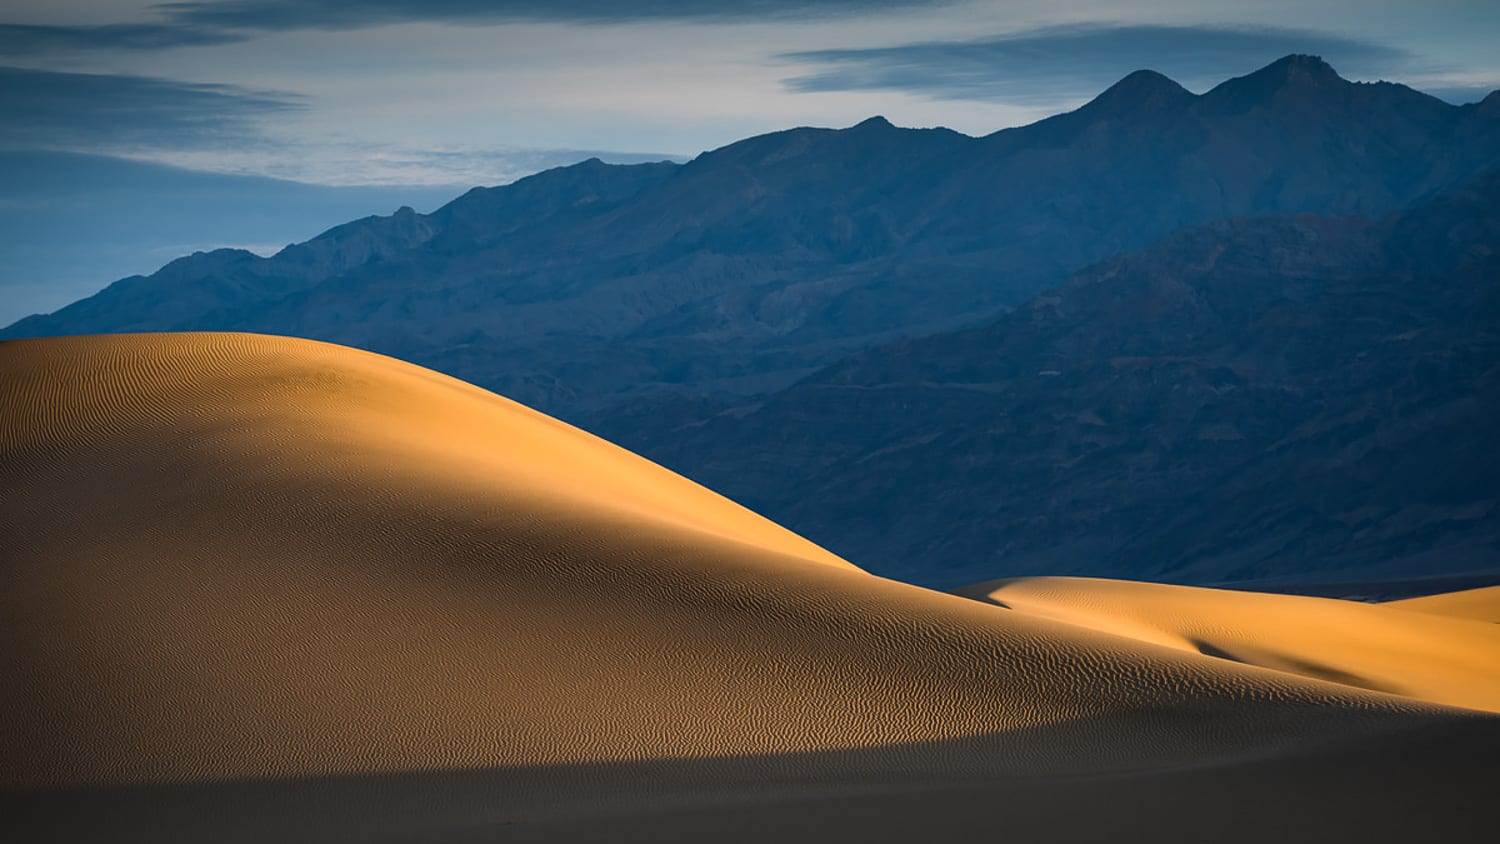
First-time photographers to desert landscapes and dune fields are excited by the panorama and are often inclined to shoot wide angle (even super wide angle) to emphasize vast dune fields and stunning rippled textures. While dramatic, this technique can have downsides: the viewer may never know where to focus his or her attention in such a wide field of view, while tall, distant mountains may be reduced to mere anthills. In landscape photography, less can often be more. Consider trying a moderately wide field of view (intimate landscape) with distinct line(s) or graphics and a dominant center of interest. You should also consider using telephoto lenses (100-300mm, full frame) to compress layers of sand ridges or vast dune fields against distant mountains while preserving the grandeur and perspectives of both.
What you choose to exclude from the frame may be just as important as what you choose to include. Eliminate any extraneous elements that do not contribute to a cohesive composition. Use strong graphical design elements. Consider including a person for scale or human footprints/wildlife trails – these can sometimes be key to a more balanced and intriguing photograph. Create abstraction and/or ambiguity; invite the viewer to ask questions and pause in wonder and awe. Consider every scale of composition, from macro/close up to large-scale stitched-frame panoramas. The possibilities are endless in sand dune photography.

Many outdoor photographers shoot only during the “Golden Hour”, spending much of the day waiting only for those first and last hours of daylight when color and contrast seem their richest. Many often choose just one composition and ‘park it’ while waiting for that one moment of peak light. This is just one exceedingly narrow way to approach shooting Death Valley sand dunes photography.
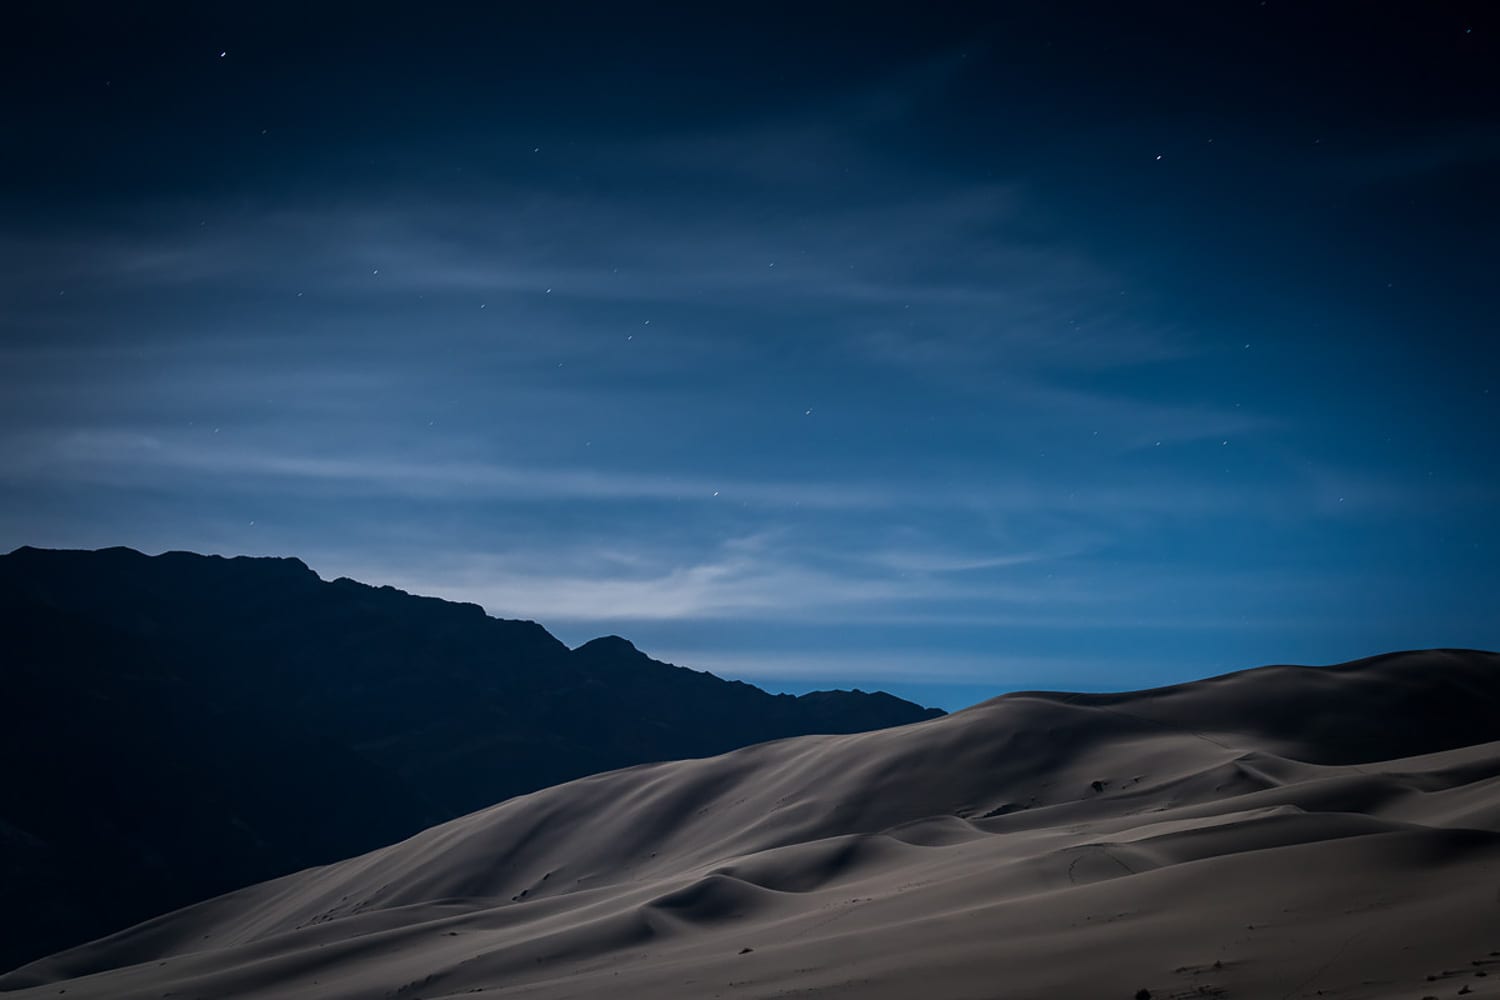
Consider enriching your personal and photographic experience by trying something like this: Take a long walking tour, following magical light as it evolves and caresses the sands. If direct/frontal light seems too “harsh”, examine other possibilities for sidelight and backlight; these are more dramatic and are my favorite. Deep wells, holes, bowls, and hollows in dune fields can take on sensuous and dramatic shadows during what many photographers might term “bad light”. Keep walking, keep searching, keep changing your direction of view, and don’t forget to think and see in monochrome (when saturated colors have little relevance) for stunning black and white desert photography. Golden Hour? Make it three.
It is not uncommon for some to feel lost or get lost on sand dune fields. You will be a happier and more productive photographer if you play it safe and use good sense—do not end up a statistic. Scout the dune field the day (or days) before with plenty of available light. Be sure to plot and plan your movements so as to not track up what you want to photograph. Maintain good situational awareness at all times. Pay attention to where you came from and to where you need to return. Occasionally turn around to look back at known landmarks and at your path of movement while on the way out. Carry a map and compass and/or GPS and be sure you know how to use them (batteries die, carry extras). Be sure to carry and consistently drink plenty of water throughout the day (other than summer, I personally ration about 1qt/litre per 2–3 hours of time spent out). Do not wait to drink until thirst arrives; that’s already late.
During the height of winter, dune fields can be exceptionally cold before dawn. During late spring through early autumn, bright sunlight on warm sand dunes can be hot and taxing. During all seasons, I recommend dressing in layers of synthetic wear with a long sleeve shirt and brimmed hat for Death Valley sand dunes photography. Being covered in synthetic layers may seem illogical for hot conditions (consider nomadic Saharan attire) but will ultimately keep you cooler while protecting your skin from damage. Carry warm gloves and a beanie on cold winter mornings, perhaps even chemical hand and foot warmers. You’ll find yourself often not moving very quickly or far as you wait on light—it can be hard to maintain warmth while standing still.

If Death Valley sand dunes photography sounds exciting and fun, that’s because it is! We never fail to have an incredible experience on the dunes and winter light in Death Valley never fails to impress.
If you’re interested in learning these and more techniques directly with me in Death Valley National Park, sign up for my Desert Photography Workshop: Death Valley taking place in February 2023.
I hope to see you there.